

Thinking about giving your bathroom a makeover? Installing a new bathtub and shower combo can really change the feel of the room. It might seem like a big job, but honestly, with a bit of planning and the right tools, homeowners can totally tackle this. This guide breaks down how to install a bathtub and shower, from getting ready to the final touches, so you can get that spa-like feel right in your own home.
Key Takeaways
- Gather all necessary tools and materials before starting the installation.
- Properly prepare the bathroom space, including clearing the area and checking plumbing.
- Follow step-by-step instructions for installing the bathtub and shower base or panels.
- Connect all plumbing fixtures securely and test for leaks.
- Finish the installation by sealing edges and performing a final inspection.
Install a Bathtub and Shower – Tools and Materials You’ll Need
Alright, so you’re ready to tackle that DIY bathtub and shower installation, huh? Whether you’re replacing an old bathtub and shower combo or aiming for a full bathroom remodel, having the right gear from the start makes a huge difference. This isn’t just about slapping in a new shower and bathtub fixtures; it’s about doing it right so you don’t have leaks or other headaches down the road. Think of this as your pre-game checklist for a successful shower and bathtub installation.
Gathering your supplies is the first real step before you even think about turning off the water.
Here’s a breakdown of what you’ll likely need:
- Tools:
- Measuring tape and a level (super important for making sure things aren’t crooked!)
- Utility knife and a caulk gun
- Adjustable wrenches and pipe wrenches (for those stubborn fittings)
- Screwdriver set (Phillips and flathead)
- Power drill with various bits (you might need masonry bits if you’re drilling into tile or concrete)
- Pliers
- A bucket and sponges for cleanup
- Safety glasses and gloves (don’t skip these!)
- Materials:
- Your new bathtub and shower unit (make sure it fits the space you have planned in your bathroom design with bathtub and shower)
- Drain assembly kit and overflow plate
- Plumber’s tape (also called Teflon tape) and plumber’s putty
- Silicone caulk (get a good quality, mold-resistant kind)
- Appropriate plumbing pipes and fittings (check what your existing setup uses)
- Shims (for leveling the tub if your floor isn’t perfectly flat)
- Fasteners like screws (check the tub manufacturer’s recommendations)
- Waterproofing membrane or sealant (especially important for shower walls)
Don’t underestimate the importance of checking the manufacturer’s instructions for your specific bathtub and shower model. They often have unique requirements or recommendations that can save you a lot of trouble. What works for one shower and bathtub combo might not be exactly the same for another.
If you’re planning a walk-in shower installation guide, you might need slightly different materials, especially for the base and waterproofing. And if you’re just doing a bathtub and shower faucet replacement, your list will be much shorter, focusing mainly on the fixtures and some basic plumbing tools. But for a full shower and bathtub installation, this list is a solid starting point for your bathtub and shower remodel.
Preparing Your Bathroom for Installation
Before you even think about unboxing that shiny new bathtub or shower unit, taking the time to prep your bathroom is super important. This isn’t just about making things look neat; it’s about preventing headaches down the road, like water damage or mold. Seriously, a little effort now saves a ton of trouble later.
First things first, you need to clear out the space. This means removing any old fixtures, like your current tub or shower. If you’re replacing an old tub, you’ll likely need to cut away the caulk around its edges and disconnect the plumbing. Be prepared for some mess and maybe even some stubborn old pipes. If you’re dealing with a Basement Bathroom Installation, make sure you have adequate ventilation and lighting, as these areas can be a bit trickier to work in.
Here’s a quick rundown of what you should be doing:
- Clear the area: Remove everything from the bathroom that you can, including toiletries, rugs, and any loose items. If you’re removing an old tub, you might need to remove surrounding wall material down to the studs for a proper renovation.
- Protect your floors: Lay down drop cloths or sturdy cardboard to shield your existing flooring from scratches, dents, and spills. This is especially important if you have delicate tile or hardwood.
- Check existing plumbing and electrical: Take a look at your current water supply lines and drain pipes. Are they in good shape? Do they line up with where your new fixtures will go? It’s also a good time to check any electrical outlets or wiring, especially if you’re installing an electric shower.
- Ensure proper ventilation: A well-ventilated bathroom is key to preventing moisture buildup. If your bathroom doesn’t have a good exhaust fan, now might be the time to consider adding or upgrading one.
Making sure your bathroom is properly prepared is like laying a solid foundation for a house. Without it, even the best-built structure can have problems. This preparation phase is where you identify potential issues and address them before they become major problems during or after the installation.
Don’t forget to gather all your tools and materials before you start the actual installation. Having everything on hand will make the process much smoother. You’ll want things like a level, tape measure, caulk gun, and of course, your new bathtub or shower components. If you’re unsure about any part of the plumbing, it’s always a smart move to consult with a professional plumber to avoid costly mistakes.
Installing the Bathtub
Alright, let’s get this bathtub set up. This is a big step in your bathroom renovation, and getting it right means a solid foundation for everything else. First things first, make sure you’ve got the space prepped. We’re talking clean, level, and ready to go. If you’re replacing an old tub, you’ve hopefully already dealt with that.
The key here is to ensure the tub is perfectly level before you secure it. This might involve adding shims underneath, especially if your subfloor isn’t perfectly flat. A level tub isn’t just about looks; it’s about proper drainage and preventing stress on the plumbing connections down the line.
Here’s a general rundown of what’s involved:
- Drain Assembly: Before the tub is fully in place, you’ll want to attach the drain and overflow fittings to the tub itself. Use plumber’s tape on the threads to get a good seal. Then, connect this to your main drain pipe. Make sure this connection is solid and won’t leak – nobody wants water seeping into the floor.
- Positioning: Gently slide the tub into its spot. For built-in tubs, you’ll be aligning it with the wall studs where it will eventually be secured. Freestanding tubs need to be positioned precisely over their drain connection.
- Securing: For built-in tubs, you’ll screw through the tub’s flange into the wall studs. This keeps the tub from shifting. Don’t overtighten, or you could crack the tub material.
- Plumbing Connections: Connect the water supply lines to the faucet rough-in and ensure the drain is properly connected to the waste line. This is where having the right tools, like an adjustable wrench, really comes in handy.
Remember to double-check all your connections. A little extra time spent here can save you a huge headache later. It’s better to find a small leak now than a big water damage problem after everything is finished.
This part of the bathroom renovation bathtub setup is where things start to feel real. Take your time, follow the manufacturer’s instructions for your specific tub model, and don’t hesitate to get a second pair of eyes if you’re unsure about any step. You can find more detailed instructions on how to install a bathtub here.
Installing the Shower Base or Wall Panels
Alright, so you’ve got your bathtub in place, and now it’s time to get the shower part sorted. This usually means putting in a shower base (sometimes called a tray) and then getting those walls up. It sounds straightforward, but there are a few things to watch out for.
First up, the shower base. You’ll want to make sure it’s perfectly level. Seriously, this is super important. If it’s not level, water won’t drain right, and you’ll end up with puddles where you don’t want them. Most bases have a bit of a slope built-in towards the drain, so you’re just making sure the whole thing sits flat on the floor. You might need to use a bit of adhesive or a mortar mix underneath to get it stable and secure. Don’t forget to connect the drain and trap to your plumbing at this stage, and maybe do a quick test with some water to make sure there are no leaks before you go any further.
Next, the walls. You’ve got a couple of main options here: pre-made wall panels or tiling. If you’re going with panels, they’re usually designed to slot together and seal up pretty well. You’ll need to attach them securely to the studs in your wall, making sure they’re plumb and square. If you’re tiling, you’ll want to put up a waterproof backer board first. This is key to preventing water damage behind your tiles. Then, you’ll tile over that, making sure to seal all the seams really well, especially around the edges and where the walls meet the shower base.
Here are a few things to keep in mind:
- Leveling is everything: Take your time with the shower base. A spirit level will be your best friend here.
- Waterproofing is non-negotiable: Whether you’re using panels or tile, make sure the whole area is properly sealed. This means using waterproof tape on seams and applying a good quality sealant.
- Check your measurements twice: Make sure the base and walls fit together as they should, and that you have enough clearance for any doors or curtains you plan to install.
Don’t rush this part. Getting the base and walls right from the start is especially important for a Basement shower, as it saves a ton of headaches down the line. It’s the foundation for a shower that works well and lasts for years..
Once the base is in and the walls are up, you’ll want to let any adhesive or sealant cure properly before moving on to the plumbing fixtures. Patience is a virtue, especially in bathroom renovations!
Installing Plumbing Fixtures
Alright, so you’ve got the tub or shower base in place, and now it’s time to hook up the water. This is where things can get a little tricky, but don’t sweat it. We’re going to connect the faucet, the drain, and the overflow.
First up, the drain. You’ll need to attach the overflow assembly to the tub itself. This is usually a plate with some screws. Then, connect the drain flange to the bottom of the tub. Make sure you use plumber’s putty or silicone sealant, depending on what the manufacturer recommends for your specific drain kit. It’s important to get a good seal here to avoid leaks later on. After that, you’ll connect the drainpipe to the flange and the overflow pipe to a tee fitting. This tee then connects to your P-trap, which is that U-shaped pipe that stops sewer gases from coming back into your bathroom. Finally, tie the P-trap into your existing drain system. If you’re not sure about this part, it might be worth calling in a plumber just for this connection.
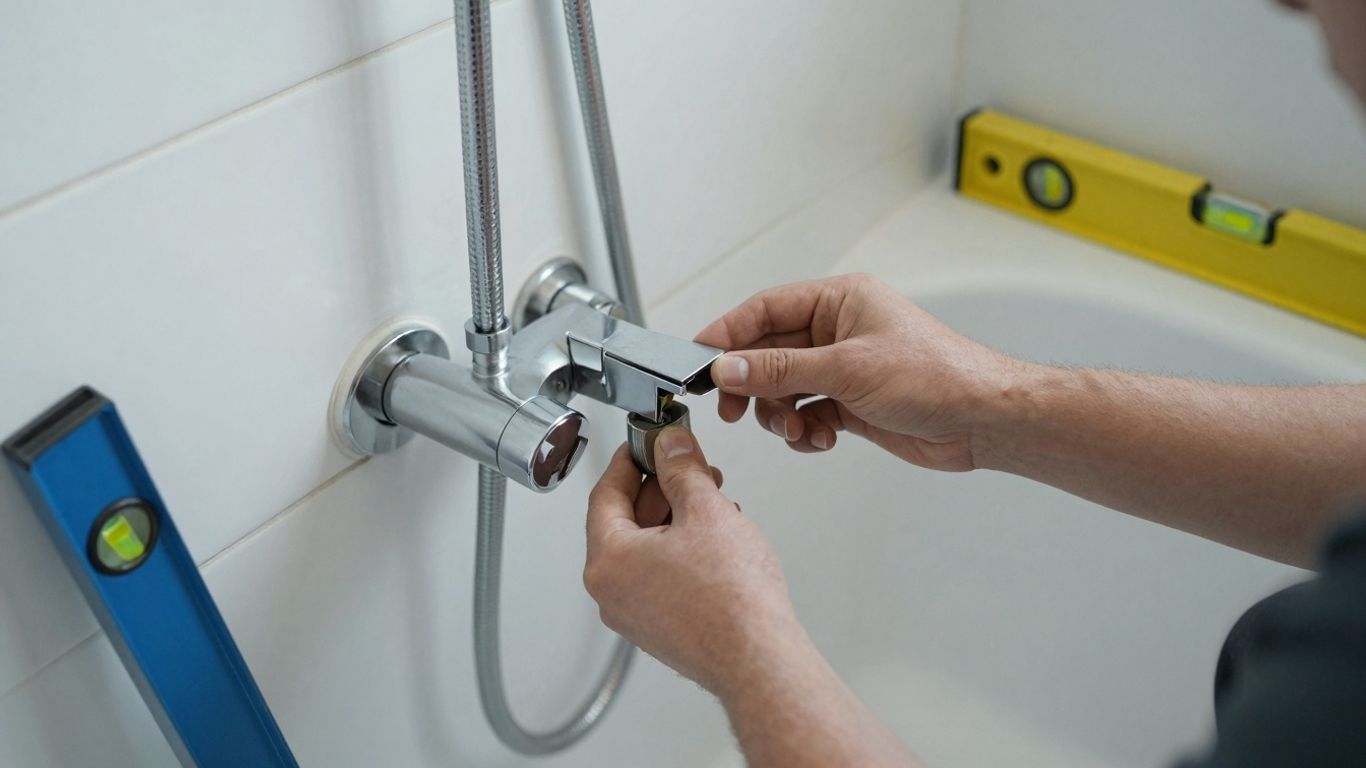
Next, the faucet and showerhead. If you have a single-handle faucet, you’ll typically connect the hot and cold water supply lines to the valve body behind the wall. Then, attach the spout to the tub and the showerhead to the diverter pipe. If you have a separate shower, you’ll connect the shower arm and head to the valve. Make sure all threaded connections are wrapped with Teflon tape to ensure a watertight seal.
Here’s a quick rundown of the parts you’ll be dealing with:
- Water Supply Lines: These bring hot and cold water to your faucet and shower.
- Faucet and Valve: This is what you turn to control the water flow and temperature.
- Tub Spout and Diverter: The spout fills the tub, and the diverter sends water to the showerhead.
- Overflow Pipe: Prevents the tub from overflowing by draining excess water.
- Drain Assembly: This includes the strainer, pipe, and P-trap to let water out and block smells.
Don’t forget to test everything before you button it all up. Turn on the water, run it through the faucet and shower, and fill the tub partway. Check every connection point for drips. It’s way easier to fix a leak now than after the walls are closed up. You don’t want to deal with water damage later, trust me. It’s a real pain and can get expensive, especially if it affects other parts of your home’s Furniture.
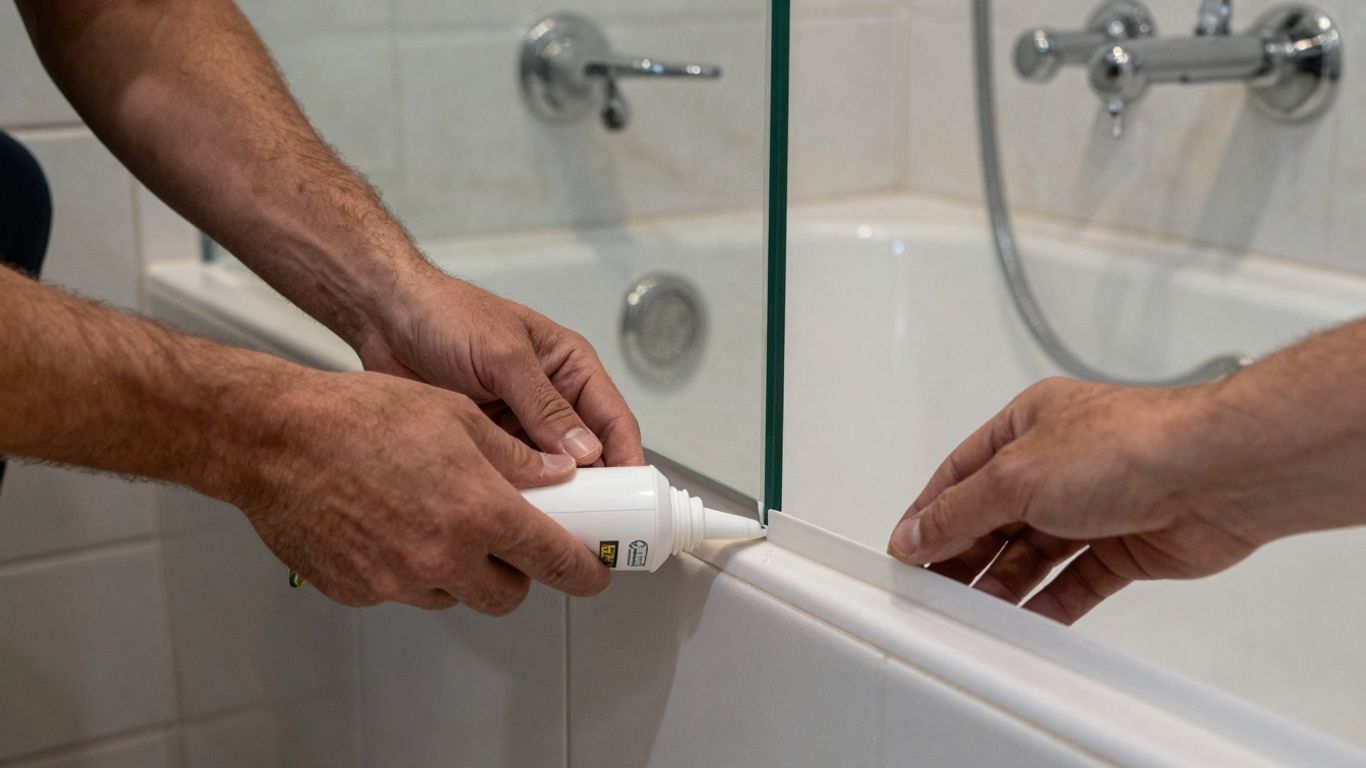
Once you’re confident there are no leaks, you can start thinking about the finishing touches. This usually involves applying caulk around the edges where the tub or shower meets the wall, and then cleaning up any excess materials. It’s all about making it look neat and tidy.
Sealing and Finishing the Bathroom
Alright, so you’ve got your tub and shower all set up, pipes connected, and everything looks pretty good. Now comes the part that really makes it look finished and, more importantly, keeps water where it’s supposed to be. We’re talking about sealing and all those final touches.
The main goal here is to create a watertight barrier, especially where the tub and shower meet the walls and floor. This stops water from getting behind your new fixtures, which can lead to some serious headaches down the line, like mold or damage to your walls. Think of it like putting a raincoat on your bathroom.
Here’s a quick rundown of what you’ll be doing:
- Caulking: This is your primary defense. You’ll want to use a good quality, waterproof silicone caulk. Apply a nice, even bead all around the edges where the tub meets the wall, where the shower base meets the wall, and anywhere else water might try to sneak in. Don’t forget the corners!
- Smoothing: After you apply the caulk, you need to smooth it out. You can use a caulk tool, a wet finger (wear a glove!), or even a damp cloth. This gives it a clean, professional look and makes sure it seals properly.
- Grouting (if tiling): If you’ve tiled the shower walls, you’ll need to grout between the tiles. Make sure you use a grout that’s suitable for wet areas and follow the manufacturer’s instructions for application and cleanup.
- Final Cleaning: Once everything is sealed and any grout has cured, give the whole area a good wipe-down. Get rid of any dust, smudges, or excess caulk.
You might be tempted to skip some of these sealing steps to save time, especially if you’re working on a tight schedule or in a smaller space like a condo bathroom. However, cutting corners here is a recipe for future problems. A little extra effort now saves a lot of potential repair work later.
While you’re in finishing mode, consider any other aesthetic touches. This could be installing trim, putting up any final wall panels, or even thinking about future upgrades. For instance, if you’re looking to refresh an older bathroom without a full gut job, the benefits of reglazing your existing tub can be a great option to consider alongside these finishing steps. It’s all about making the space look and function its best. Even areas like a laundry room can benefit from similar waterproofing techniques if they’re near plumbing.
Final Inspection and Testing
Alright, you’ve put in the work, and now it’s time to make sure everything is solid. This is where we check our handiwork before calling the job done. First off, let’s talk about leaks. Turn on the water – both hot and cold – and let it run for a good few minutes. Keep a close eye on all the connections, the faucet, the showerhead, and especially where the tub or shower base meets the walls and floor. Look for any drips, trickles, or even damp spots. A small leak now can turn into a big, expensive problem later.
Here’s a quick checklist to run through:
- Water Pressure: Is the water pressure what you expect? Not too weak, not gushing out uncontrollably.
- Drainage: Does the water drain away smoothly from the tub or shower base? No standing water pooling up.
- Fixture Operation: Do the faucet handles, diverter (if you have one), and showerhead work as they should? Can you switch between modes easily?
- Sealant Integrity: Double-check the caulk or silicone around the edges. It should be smooth, continuous, and firmly adhered to both surfaces.
After running the water, it’s a good idea to let everything sit for a bit, maybe an hour or so, and then check again. Sometimes, slow leaks only show up after a little while. This is also the time to look at the surrounding walls and floor for any signs of moisture that might have seeped through.
If you’re installing a new tub, you might want to test fit the unit in the alcove first to make sure everything aligns properly before you start securing it. This is a good way to catch any measurement issues early on. For shower units, ensure the base is level and securely fastened to prevent any wobbling down the line. You can find more details on securing the base and test fitting here.
Finally, give everything a good wipe-down. Clean off any dust, debris, or fingerprints. A clean, dry unit looks and feels finished. If everything checks out, congratulations! You’ve successfully installed your new bathtub and shower.
Maintenance Tips After Installation
So, you’ve got a shiny new bathtub and shower combo. Awesome! Now, the real trick is keeping it looking good and working right without a ton of hassle. Think of it like taking care of a new car – a little attention now saves big headaches later.
First off, cleaning is key. For your tub and shower walls, a quick wipe-down after each use can really cut down on soap scum and water spots. Don’t let things build up, because then you’re scrubbing way harder than you need to. For tougher spots, a mild bathroom cleaner usually does the trick. Just avoid anything too harsh, like abrasive powders or steel wool, especially on acrylic or fiberglass surfaces – you don’t want to scratch up that new finish.
When it comes to the grout and caulk, keep an eye on them. This is probably the most important part to watch for leaks. If you start seeing any cracks or gaps, especially where the tub meets the wall or floor, get them sealed up pronto. A small crack can let water get behind things, and that’s how you end up with bigger problems like mold or water damage. A simple tube of silicone caulk and a caulking gun are your best friends here.
Here’s a quick rundown of what to check periodically:
- Faucets and Showerheads: Make sure they aren’t dripping when they’re turned off. A slow drip might not seem like much, but it wastes water and can leave mineral deposits.
- Drainage: Does the water still go down smoothly? If your tub or shower starts to drain slowly, it might be time to clear out some hair or gunk from the drain. A drain snake or even a bent wire hanger can sometimes do the trick.
- Grout and Caulk: As mentioned, check for any signs of wear, cracking, or mildew. Re-caulking is a pretty straightforward job.
And don’t forget about the shower doors or curtains. Clean them regularly to prevent soap scum and mildew. For glass doors, a squeegee after showering works wonders. If you have curtains, giving them a wash every few months can keep them fresh.
Taking a few minutes each week for simple cleaning and a quick inspection can make a huge difference in the lifespan and appearance of your new bathtub and shower. It’s much easier to use kitchen cleaning habits—like regular wipe-downs and quick checks—than to deal with major repair issues later on.
Conclusion
So, you’ve made it through the installation process! Give yourself a pat on the back. Installing a bathtub and shower combo is a big project, but totally doable with the right approach. Remember, the goal was to create a more functional and maybe even more stylish space in your home. Whether you went with a simple setup or added some fancy features, the result should be a bathroom that works better for you and your family.
Think about the little things that make a difference:
- Proper sealing around the tub and shower is key to preventing water damage down the line.
- Testing all the fixtures ensures everything works as it should before you start using it daily.
- Keeping up with regular cleaning will help your new installation look great for years.
This kind of project can truly transform your bathroom. It’s not just about having a place to get clean; it’s about creating a personal oasis. Working with a trusted Ottawa contractor, you can ensure your bathroom addition is designed beautifully and built to last. Plus, these upgrades can significantly increase your home’s value if you ever decide to sell.
Taking the time to do it right, from preparation to the final touches, makes all the difference. It’s about creating a space that’s not only beautiful but also practical and durable for everyday use. Don’t forget to enjoy your new setup!
Ultimately, a well-installed bathtub and shower system is a win. It improves daily routines, adds comfort, and can even boost your home’s appeal. Enjoy the upgrade!
In conclusion, we’ve covered the key points. Ready to start your project? Visit our website today to learn more and get a free quote!
Frequently Asked Questions
How long does it usually take to install a bathtub and shower?
Putting in a new bathtub and shower can take anywhere from a few hours to a couple of days. It really depends on how complicated the job is and whether you’re just swapping out an old one or starting from scratch. If you’re doing it yourself, give yourself plenty of time, maybe a whole weekend, to be safe.
Do I really need to hire a professional for this job?
If you’re pretty handy with tools and understand basic plumbing and maybe a little electrical work (for showerheads with lights or heaters), you might be able to do it yourself. But if you’re not sure about any part of the process, especially the plumbing connections, it’s a really good idea to call in a pro. Mistakes can lead to leaks and expensive damage.
Should flooring go under a bathtub?
Yes, flooring should go under a bathtub to prevent moisture damage, ensure proper support, and create a clean, long-lasting finish.
What are the main differences between a bathtub and a shower stall?
A bathtub is a deep basin you can fill with water to soak in. A shower stall is usually a smaller, more open space with a showerhead where you stand to wash. Some people choose to convert their tub into a shower to make it easier to get in and out, especially if they have trouble stepping over the tub edge.
What kind of tools and materials will I absolutely need?
You’ll definitely need some basic tools like a measuring tape, a level, a utility knife, and wrenches. You’ll also need things like silicone caulk to seal up edges, a bathtub drain kit, and maybe some plumber’s tape to make sure connections don’t leak. Always check the instructions for your specific tub and shower model.
What’s the most important thing to do to prevent leaks?
The most critical step for preventing leaks is proper sealing. Make sure all your plumbing connections are tight and use silicone caulk all around the edges where the tub or shower meets the walls and floor. After installation, always test everything by running water to check for any drips before you finish up.
How much does it cost to install a new bathtub and shower?
The cost depends on the tub and shower style, plumbing needs, labor, and any bathroom upgrades or layout changes required.
Can I install a shower if I don’t have much plumbing experience?
For simple shower replacements, like swapping out an old showerhead, you might be okay. But for a full shower installation, especially if you need to move pipes or connect new drains, it’s best to have some plumbing knowledge or hire someone who does. Getting the plumbing wrong can cause big problems down the road.
