

Wood floors look great, right? They add a certain charm to a home. But then, oops, a pipe bursts or maybe the dishwasher decides to go rogue. Suddenly, your beautiful wood floors are looking less than stellar. Water damage can really mess things up, causing warping, staining, and all sorts of headaches. If you’re searching for how to repair hardwood floor with water damage, don’t panic. This guide will walk you through the steps to get your floors back in shape, or at least help you figure out if it’s time to call in the pros.
Key Takeaways
- Act fast to stop the water source and start drying immediately to minimize damage.
- Thoroughly dry the affected area using fans and dehumidifiers, avoiding direct heat.
- Clean and disinfect the surface to prevent mold and mildew growth.
- Sand down minor damage or stains, and refinish to match the existing floor.
- Replace boards that are severely warped, buckled, or discolored.
Understanding Water Damage to Wood Floors
Seeing water on your beautiful hardwood floors can be a real gut punch. It doesn’t matter if it’s a leaky pipe under the sink, a storm that overwhelmed your gutters, or even just a really humid basement – water and wood are not friends. When water gets into your wood floors, it can cause all sorts of problems, from ugly water stain removal from wood floors to more serious issues like warping and buckling. The quicker you address the situation, the better your chances are of salvaging wet wooden flooring.
Water damage can manifest in a few ways:
- Surface Stains: These are often the first thing you notice, appearing as dark spots or rings where the water sat.
- Cupping: This happens when the edges of the wood planks swell more than the center, causing them to curl upwards.
- Crowning: The opposite of cupping, where the center of the plank swells higher than the edges.
- Buckling: This is when the floorboards lift significantly from the subfloor, often due to extreme swelling.
- Mold and Mildew: Damp wood is a perfect breeding ground for mold, which can start growing in as little as 48 hours and poses health risks.
Dealing with waterlogged hardwood floors requires a swift and methodical approach. Whether you’re drying out basement wood floors or tackling a spill in your living room, understanding the potential damage is the first step in effective wood floor water damage restoration. It’s not always about full replacement; sometimes, careful cleaning wet wood floors and targeted repairs can bring your flooring back from the brink.
The key takeaway is that time is your biggest enemy when water meets wood, especially with solid oak flooring, which can quickly absorb moisture and begin to warp. The longer moisture lingers, the more damage it can do, making the process of repairing waterlogged hardwood much more difficult and potentially more expensive. Acting fast is the best way to minimize the impact and increase the chances of successful wood floor water damage restoration.
Assessing the situation properly is vital. Is it just a surface issue, or has the water penetrated deep into the wood and subfloor? This initial assessment will guide your entire wood floor water damage restoration plan, from drying out basement wood floors to cleaning mold from damp wood floors if necessary. Remember, even seemingly minor spills can lead to significant problems if left unattended, making the prospect of repairing waterlogged hardwood a pressing concern for many homeowners.
Step 1: Identify the Type and Extent of Damage
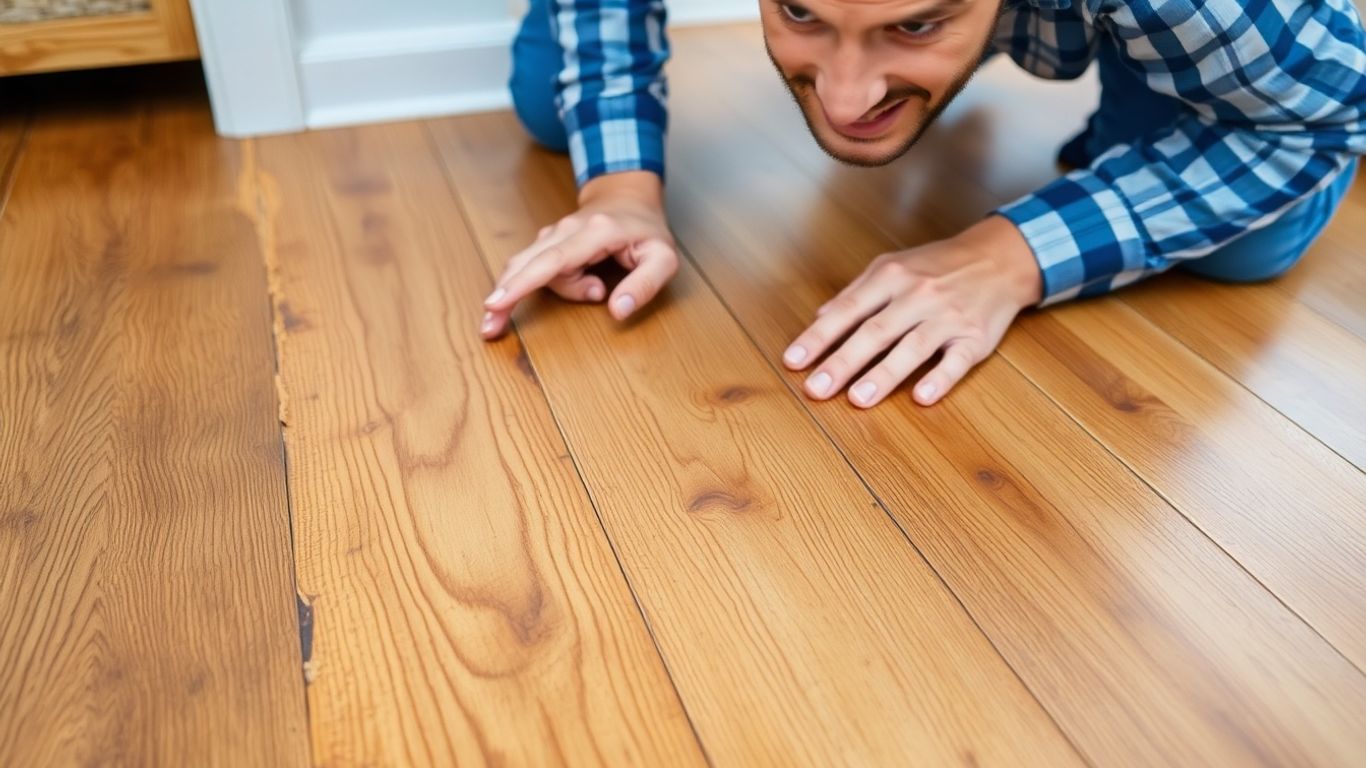
Alright, so you’ve got a water situation on your hands, and your nice wood floors are looking a little sad. The first thing to do, before you even think about grabbing a mop or a fan, is to figure out just how bad things are. This initial assessment is super important because it dictates everything that comes next.
Think about where the water came from. Was it a tiny spill from a pet bowl, a leaky dishwasher, or a full-on flood from a burst pipe? Knowing the source helps you stop it, obviously, but it also gives you clues about how long the wood was wet and how deep the moisture might have gone.
Next, let’s look at the floors themselves. What are you seeing?
- Minor Cupping: The edges of the boards might be slightly raised, like tiny waves. This often means the surface got wet, but maybe the subfloor is okay.
- Warping or Buckling: This is when the boards start to lift or bend significantly. If it’s just a few boards, it might be fixable. If it’s widespread, that’s a bigger problem.
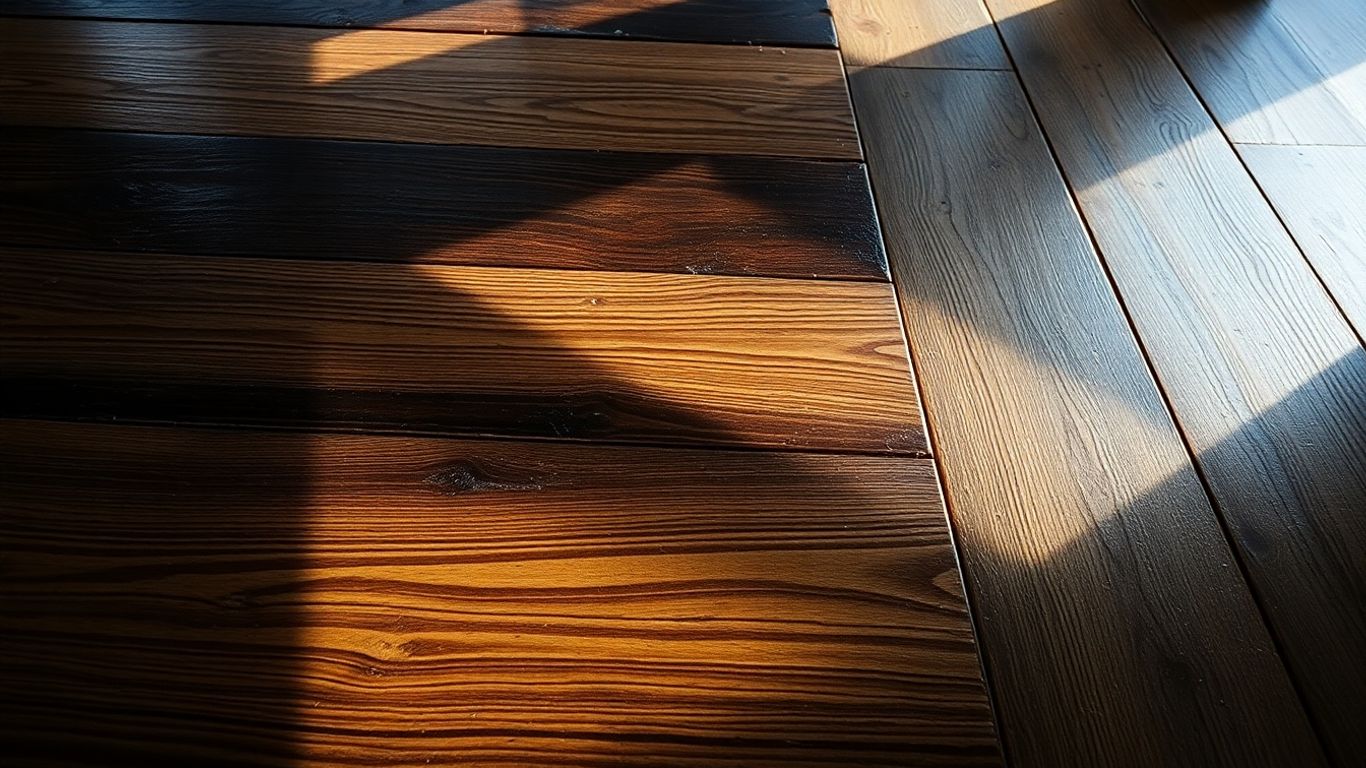
- Discoloration: You might see dark spots or staining. Light discoloration could just be on the finish, but deep, dark stains can mean the wood itself is soaked or even starting to rot.
- Soft Spots: If you press down on an area and it feels spongy or soft, that’s a bad sign. It usually means the subfloor underneath is waterlogged and potentially compromised.
- Mold or Mildew: Any sign of fuzzy growth or a musty smell is a red alert. Mold can spread fast and is a health hazard.
To really get a handle on the moisture, especially if you can’t see any obvious signs, a moisture meter is your best friend. You can often rent these from hardware stores. Normal moisture content for hardwood is usually between 6% and 12%. Anything over 20% is a serious concern and likely means you’ll need professional help. You’ll want to test in several spots, especially near walls and in areas that feel damp. This tool can really help you understand the full extent of the damage.
Don’t just look at the surface of your wooden floor. Water loves to hide. It can seep under baseboards, into the subfloor, and even into the walls. If you don’t dry everything out completely, you’ll be dealing with mold and rot down the road, even if the floor looks okay at first glance.
Here’s a quick rundown of what might be repairable versus what likely needs replacement:
| Damage Type | Likely Repairable? | Notes |
|---|---|---|
| Minor surface stains | Yes | May require cleaning and refinishing. |
| Slight cupping | Yes | Often resolves with proper drying and sanding. |
| Isolated warping | Maybe | Depends on severity and duration of moisture exposure. |
| Severe buckling/lifting | No | Boards are likely compromised and need replacement. |
| Soft/spongy subfloor | No | Subfloor needs replacement, which means floor removal. |
| Black mold | No | Health hazard; requires professional remediation and likely replacement. |
Taking the time to really assess the situation now will save you a lot of headaches (and money) later. If things look really bad, don’t hesitate to call in the pros.
Step 2: Dry the Affected Area Completely
Okay, so you’ve found the water leak and hopefully stopped it. Now comes the part that requires some serious patience: drying everything out. If you’re dealing with how to fix warped wood floor from water, this step is one of the most important parts of the process. This isn’t just about mopping up puddles; wood is like a sponge, and it soaks up moisture deep down, even under the boards and in the subfloor. Getting this part right is key to preventing bigger problems like mold or warped wood.
Here’s how to tackle the drying process:
- Remove Standing Water: If there’s any water sitting on the surface, get rid of it ASAP. Use a wet/dry vac, mops, or old towels. Don’t use your regular vacuum cleaner for this – it’s not built for water and could be dangerous.
- Boost Airflow: Set up fans, like the powerful ones you might see at a construction site, to keep air moving constantly over the wet areas. Open windows if the air outside is drier than inside, but close them if it’s humid.
- Use Dehumidifiers: These machines are your best friend right now. They pull moisture right out of the air, which helps the wood dry faster. Run them 24/7.
- Check Hidden Spots: If you can, try to get air circulating under the floorboards. This might mean removing baseboards to let air get into the wall cavities, or if you have a basement or crawlspace, directing fans down there.
Don’t try to speed things up with a space heater or direct sunlight. Too much heat too fast can actually make the wood crack or warp even worse. It’s a slow and steady process.
How dry is dry enough? Ideally, you want the wood’s moisture content to be within about 4% of its normal, dry state. You can get a moisture meter to check this, and it’s a good idea to monitor it daily. This whole drying phase can take anywhere from a few days to a couple of weeks, depending on how much water there was and how humid it is. After the initial aggressive drying, the wood will continue to release moisture slowly over months, so keep an eye on it.
Step 3: Clean and Disinfect the Surface
Once everything is bone dry, it’s time to tackle any grime or potential mold that might have set up shop. This isn’t just about making things look nice; it’s about preventing bigger problems down the line, like mold growth, which can be a real health hazard and seriously damage your subfloor.
First things first, give the whole area a good sweep or vacuum to pick up any loose debris. Then, you’ll want to clean the floor itself. A solution of mild dish soap and water usually does the trick for general cleaning. Just make sure you don’t overdo it with the water – a damp mop is your friend here, not a soaking one. Wring it out really well!
For disinfecting, a solution of one part white vinegar to four parts water is a good, natural option. Vinegar is great at killing off a lot of common household germs and mold spores. If you’re dealing with a more serious situation or are worried about mold, you might consider a specialized wood floor cleaner that also has disinfecting properties. Always test any cleaning solution in an inconspicuous spot first, though, just to be safe.
Here’s a quick rundown of what to do:
- Sweep or vacuum the floor to remove loose dirt and dust.
- Clean the floor with a well-wrung-out mop dampened with a mild soap and water solution.
- Disinfect the area using a vinegar and water mix or a dedicated wood floor disinfectant.
- Allow the floor to air dry completely before moving on to the next step. You can use fans to speed this up.
Remember, the goal here is to eliminate any lingering moisture and prevent the growth of mold and mildew. Be thorough but gentle, and always prioritize safety by ensuring good ventilation while you work.
If you notice any stubborn stains or discoloration that cleaning doesn’t fix, don’t worry too much just yet. Sanding in the next step should take care of most surface imperfections. But if you see any signs of mold that look like they’re spreading or are deeply embedded, it might be time to call in a professional mold remediation service. It’s better to be safe than sorry when it comes to mold.
Step 4: Sand and Refinish the Floor
Alright, so your floor is finally dry. That’s a huge win! Now comes the part where we make it look good again. If the water damage was bad, you might have some warped boards or the finish might be all messed up – think blisters, cracks, or just a dull, lifeless look. This is where sanding and refinishing come in.
First off, you’ll likely need to sand the affected areas. If it’s just a few boards, you might get away with sanding just those spots. But honestly, to make it look right and blend in, you’ll probably want to sand the whole floor. This gets rid of the old, damaged finish and preps the wood for a fresh start. You’ll want to start with a coarser grit sandpaper, maybe around 60-80 grit, especially if there’s any significant warping or unevenness. Then, you’ll move to finer grits, like 120 and then 220, to get that super smooth surface. Make sure you vacuum up all the dust between grits – seriously, all of it.
After sanding, it’s time to refinish. This means applying a new stain, if you want to match the color, and then a protective topcoat. If you’re just doing a small area, try to get a stain that matches your existing floor as closely as possible. Test it in a hidden spot first! Then, apply a few thin coats of a good quality polyurethane. It’s really important to let each coat dry completely according to the manufacturer’s instructions before applying the next. Rushing this part is a recipe for disaster.
If the damage was really severe, like boards that are completely warped, cracked, or discolored beyond repair, sanding and refinishing might not be enough. In those cases, you’ll have to replace the damaged boards entirely. This is a bit more involved and might be a good time to call in a pro if you’re not comfortable with that kind of work.
Here’s a quick rundown of the refinishing process:
- Clean the sanded floor thoroughly. Dust is the enemy of a good finish.
- Apply stain (if needed). Use a clean cloth or brush and work in the direction of the wood grain. Wipe off any excess.
- Apply the first coat of finish. Use a good quality polyurethane or other wood finish. Thin coats are better than one thick one.
- Lightly sand between coats. Once the first coat is dry, give it a very light sanding with a fine-grit paper (like 220 or higher) and clean again. This helps the next coat adhere better.
- Apply subsequent coats. Usually, two or three coats of finish are recommended for good protection.
- Allow for full curing. Don’t walk on the floor or put furniture back for at least a few days, or as long as the finish manufacturer recommends. Curing takes longer than just drying.
Step 6: Protect and Seal the Repaired Floor
Alright, so you’ve gone through the whole drying, cleaning, and sanding process. Your floor is looking pretty good, right? Now comes the part where we make sure it stays that way. This is all about putting a good shield back on.
First things first, you need to pick the right finish. Most hardwood floors have a protective coating, usually polyurethane. You’ll want to match what you had before, or at least get something that’s compatible. If you’re unsure, it’s always a good idea to test it on a scrap piece of wood or an out-of-the-way spot.
Here’s a quick rundown of what to do:
- Apply the finish in thin, even coats. Don’t try to get it all done in one go. It’s better to do multiple thin layers than one thick, gloppy one. This helps it dry properly and prevents streaks.
- Allow adequate drying time between coats. Seriously, don’t rush this. Check the product instructions, but usually, it’s at least a few hours, sometimes even overnight.
- Lightly sand between coats (optional but recommended). Use a very fine-grit sandpaper (like 220 grit or higher) to gently scuff up the surface between coats. This helps the next layer stick better and gives you a smoother final result. Just be sure to wipe away all the dust afterward.
- Finish with a final coat. Once you’ve applied all your layers and they’ve dried, you’re pretty much done with the application.
The goal here is to create a durable barrier that repels moisture and wear.
Remember, the finish is your floor’s first line of defense against future spills and accidents, especially when trying to prevent issues like wood floor swelling from water. Taking the time to apply it correctly will pay off in the long run, keeping your floors looking great and making them easier to clean.
After the final coat has cured (which can take a few days to a week, depending on the product), you can put furniture back and walk on it normally. Just be a little gentle for the first week or so as it fully hardens. For more detailed information on sanding and refinishing, you can check out how to fix water damage.
Step 7: Prevent Future Water Damage
Okay, so you’ve gone through the whole ordeal of fixing your water-damaged wood floors. That’s a relief, right? But now comes the important part: making sure it doesn’t happen again. Nobody wants to repeat that process.
The best defense is a good offense when it comes to water damage. This means being proactive around your home. Think about where water could potentially cause problems and tackle those spots before they become an issue.
Here are some solid ways to keep your floors safe:
- Immediate Spill Cleanup: This sounds obvious, but seriously, wipe up any spills the second they happen. Don’t let them sit, even for a few minutes. For hardwood floors, starting with a dry mop to pick up loose debris is a good first move before any damp cleaning prevent water damage.
- Appliance and Plumbing Checks: Regularly peek at your dishwasher, washing machine, refrigerator (especially the ice maker line), and under sinks. Look for any drips, condensation, or signs of wear on hoses and connections. Catching a small leak early can save you a massive headache.
- Humidity Control: Wood expands and contracts with changes in humidity. Keeping your home’s humidity levels between 30-50% is ideal. You can use a dehumidifier in damp months or a humidifier when the air is too dry. A simple hygrometer can help you monitor this.
- Gutters and Drainage: Make sure your gutters are clean and directing water away from your home’s foundation. Check that downspouts are clear and that the ground slopes away from your house. This prevents water from pooling near your foundation and potentially seeping into your basement or crawl space.
- Strategic Mat Placement: Put down absorbent mats or rugs in areas prone to moisture, like entryways, kitchens, and bathrooms. These act as a first line of defense against tracked-in water or splashes.
- Leak Detectors: Consider installing small, inexpensive leak detectors under appliances like dishwashers and washing machines, or near water heaters and toilets. They can alert you to a leak much faster than you might notice it yourself.
Dealing with water damage is stressful enough. Taking these preventative steps can give you peace of mind and protect your beautiful wood floors for years to come. It’s about building good habits around your home’s maintenance.
Don’t forget to check your homeowners insurance policy to understand what kind of water damage is covered, as policies often differ on sudden versus gradual leaks.
When to Call a Professional for Fix Water-Damaged Wood Floors
Look, sometimes you just gotta know when to throw in the towel and call in the cavalry. While a small spill might be no big deal, there are definitely times when trying to fix water-damaged wood floors yourself can turn into a bigger headache than it’s worth. If you’re seeing any of these signs, it’s probably time to get a pro involved.
Here are a few situations where professional help is a good idea:
- Extensive Damage: If more than a few boards are affected, or if the water has seeped under cabinets or walls, it’s getting serious. Professionals have the tools to really get into those tight spots and dry things out properly.
- Warping or Buckling: If your floor is starting to look like a roller coaster, with boards lifting or sagging, that’s a sign of deep moisture issues. Trying to flatten that out yourself can be really tough and might just make it worse.
- Mold or Musty Smells: That lingering damp smell? It could be mold starting to grow, and that’s no joke. Pros have ways to detect and treat mold before it becomes a major health hazard.
- Subfloor Issues: If the water got down to the subfloor and it feels soft or spongy, that’s a structural problem. Replacing subflooring is a job for experienced folks.
- You’re Unsure: Honestly, if you’re just not feeling confident about the repair, or you don’t have the right equipment like industrial fans or moisture meters, it’s okay to call it. Getting a professional assessment can save you time and money in the long run.
Trying to fix significant water damage without the right knowledge and equipment can lead to hidden problems like mold or structural weakening down the line. It’s better to invest in professional help upfront than to deal with more costly repairs later.
For situations like these, reaching out to an Ottawa Renovation Contractor that specializes in water damage restoration is your best bet. They have the specialized equipment and know-how to properly dry, clean, and repair your floors, and they can often help with insurance claims too.
Conclusion
So, you’ve gone through the steps, dried things out, maybe even done some sanding and refinishing. It’s a good feeling to bring your floor back from the brink. Remember, not every water incident spells doom for your hardwood. Minor, localized water damage can often be fixed with the right approach, like replacing individual boards or a good refinishing job.
It’s all about being thorough. Did you get the subfloor completely dry? Is the moisture content back to normal levels? Here’s a quick look at what to aim for:
- 6-12% Moisture: This is your sweet spot, the normal range. Just keep an eye on it.
- 13-19% Moisture: Things are a bit damp. Keep drying and check daily.
- 20%+ Moisture: This is serious. Time to call in the pros.
Dealing with water damage can be a real headache, and sometimes, it’s just too much for a DIYer. If you’re looking at widespread damage, suspect mold, or just don’t have the right tools, don’t be afraid to get help. A professional can assess the situation and make sure it’s handled correctly, saving you potential future problems.
Taking care of your floors after a water event is a marathon, not a sprint. Patience during the drying phase is key, and rushing the process can lead to more damage than the water itself. Always prioritize getting the wood completely dry before you even think about cosmetic fixes.
Ultimately, the goal is to protect your investment. By understanding how water affects wood and knowing when to tackle it yourself versus when to call in experts, you can keep your floors looking great for years to come.
We’ve covered a lot of ground, and hopefully, you’re feeling inspired. Ready to make your dream space a reality? Visit our website today to see more of our work and get started on your next project!
Frequently Asked Questions
Can my wood floors be fixed after getting wet?
Often, yes! If the water damage isn’t too bad and you act fast, you can usually dry out and fix your floors. For small spots, cleaning and drying might be all you need. But if the wood is warped or looks really bad, you might need to replace some boards.
How long does it take for wet wood floors to dry out?
It really depends on how much water there was and how wet the floor got. It could take a few days, or sometimes even a few weeks for everything to dry out completely. Using fans and dehumidifiers helps speed things up.
Does home insurance pay for water damage to wood floors?
Usually, insurance covers water damage if it happened suddenly, like from a broken pipe or a storm. But if the damage was caused by a slow leak or something you could have prevented, they might not cover it. It’s best to check your specific insurance policy.
What happens if I don’t fix my water-damaged wood floors?
If you leave wet wood floors alone, bad things can happen. Mold can start to grow, which is unhealthy. The wood can rot, making the floor weak. It can also make your floors look terrible and lower the value of your home.
Should I try to fix the floors myself or hire someone?
For small issues like minor stains, you can probably fix it yourself. But if the wood is badly warped, swollen, or you see mold, it’s much safer and often better to call a professional. They have special tools and know-how to fix it right.
How can I stop my wood floors from getting damaged by water again?
The best way is to find out what caused the water problem in the first place and fix it. Make sure to clean up spills right away. You can also put down mats in places where water might get, like near the sink or by the door. Some people even use special sealants to protect the wood.
How to fix parquet floor water damage?
Dry the floor immediately with fans and a dehumidifier, then sand and refinish minor damage. Replace any swollen, loose, or mold-affected parquet tiles.
What is the difference between cupping and crowning in wood floors?
Cupping is when the edges of a board curl upward and the centre is lower — caused by the underside of the board absorbing more moisture than the top. Crowning is the opposite: the centre of the board rises higher than the edges. Crowning most commonly occurs when a cupped floor is sanded before it has fully dried — the centre is sanded flat while still wet, then rises as it dries. Always use a moisture meter before sanding to avoid turning a cupping problem into a crowning problem.
Will a swollen wood floor go back to normal on its own?
No. A wood floor that shows cupping, crowning, or significant swelling will not return to its original flat surface on its own — even after it fully dries. You need to dry it completely first, then sand the affected boards level before refinishing. Attempting to sand a still-wet floor is the biggest mistake to avoid, as it causes crowning once the wood finishes drying.
